Continuous Testing Using AWS Device Farm
In my previous post, we learned how to conduct Automated Mobile App Testing in Amazon Device Farm using the Appium Java TestNG framework. In this post, we will learn about continuous integration using the Amazon Device Farm.
Automated tests can be scheduled in Jenkins to perform continuous testing using the Amazon Device Farm for each new build of the application. It is useful to perform regression testing of each build with Amazon Device Farm.
There is an Amazon Device farm plugin is available for Jenkins. Here are the steps on how to configure your AWS account with Jenkins.
Download and install ADF plugin in Jenkins:
To download the Jenkins plugin, you need to:
- Login to the Jenkins UI
- Find the plugin by choosing Manage Jenkins > Manage Plugins > Available
- Search for “aws-device-farm”
- Install the AWS Device Farm plugin
- Restart Jenkins
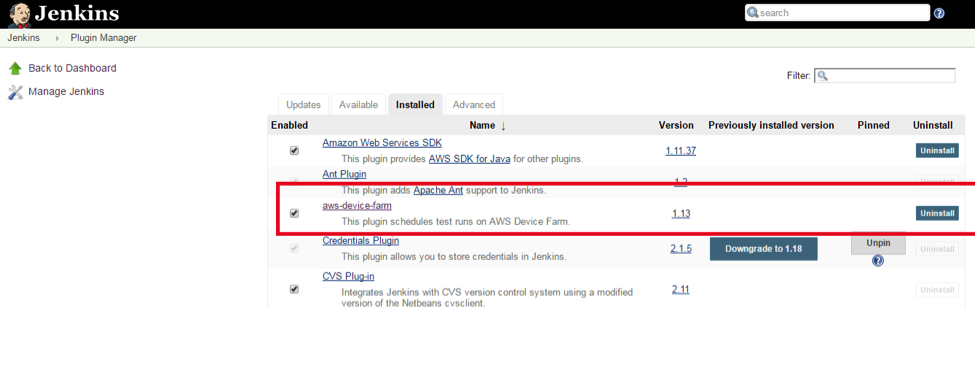
- Now navigate to Manage Jenkins > Manage Plugins > Installed
- Verify “aws-device-farm” plugin is installed
Create an AWS Identity and Access Management User for Jenkins CI Plugin:
AWS Identity and Access Management (IAM) is a web service that enables Amazon Web Services (AWS) customers to manage users and user permissions in AWS. Here we will use it to access the AWS Device Farm through Jenkins. Click here for details on IAM user permissions for accessing Device Farm and on creating and assigning access policy in IAM.
First Time Configuration Guidelines:
To use the Amazon Device Farm plugin, the system needs to be configured as given below:
- In the Jenkins web UI, on the left-hand side of the screen, choose Manage Jenkins > Configure System
- Scroll down to the AWS Device Farm header
- Enter your Access Key ID and Secret Access Key into their respective boxes
- Click on the Save button
Now Jenkins is configured for Amazon Device Farm.
How to use ADF Plugin:
Follow the given instructions to use the ADF plugin in a Jenkins job:
- Log into Jenkins web UI
- Click the job you want to edit
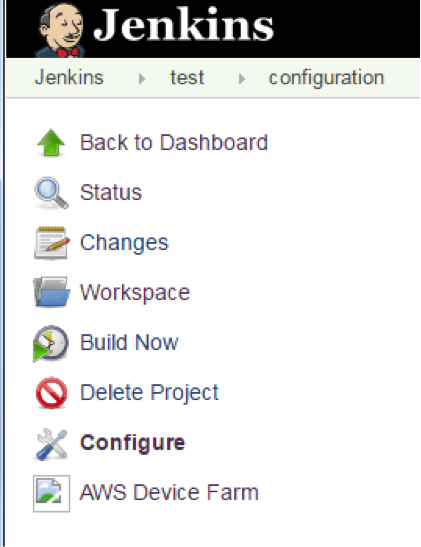
- On the left-hand side of the screen, select Configure
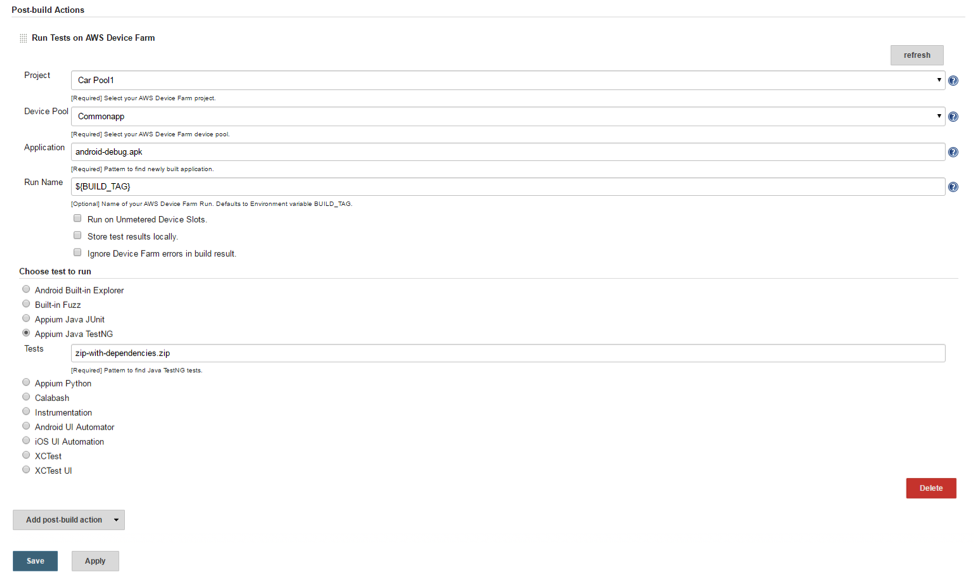
- Scroll down to the Post-build Actions header; the AWS Device Farm section should be visible in the “Post-build Actions” section of project configuration
- Select your AWS Device Farm project from Project dropdown box
- Select preferred device pool
- In Application, enter the path of APK built
- Choose test to run. I have selected “Appium Java TestNG”
- After selecting the Test Type, the respective fields are displayed. In my case it is “Tests,” where the name of the test zip file (.zip file containing test script and all the required dependencies) needs to be entered
- Choose Save
Now we are good to go.
Click on the “Build Now” option in the left side options menu of the selected project.
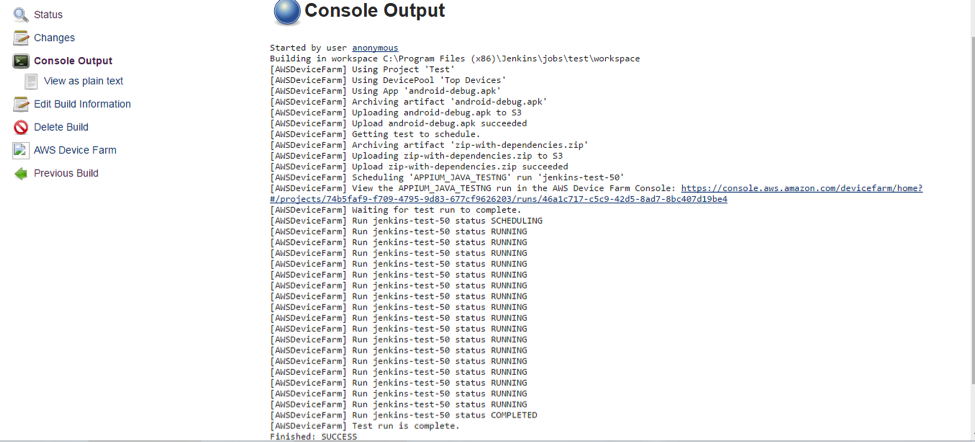
Now the build will start running.
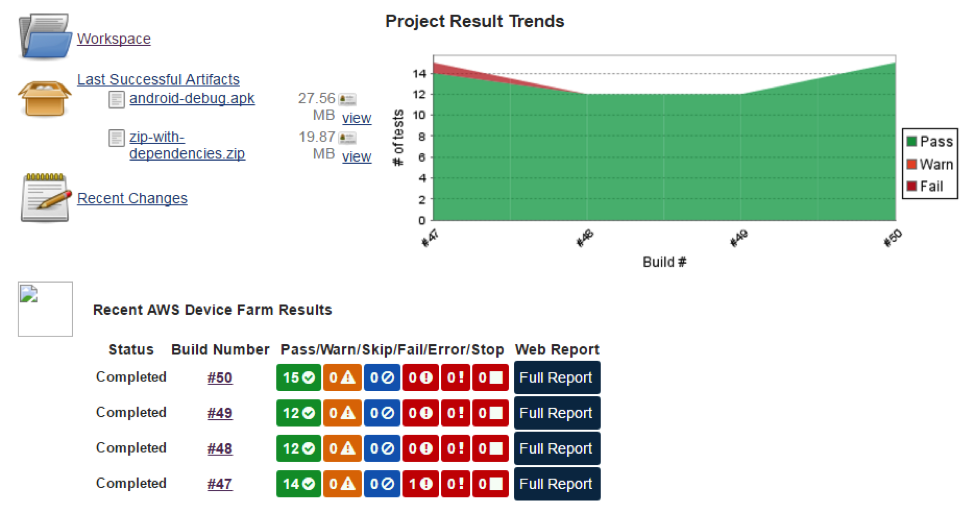
Once the build has been successfully completed, both nice charts on the Jenkins project and links (“Full Report” link) to web reports on AWS will be displayed:
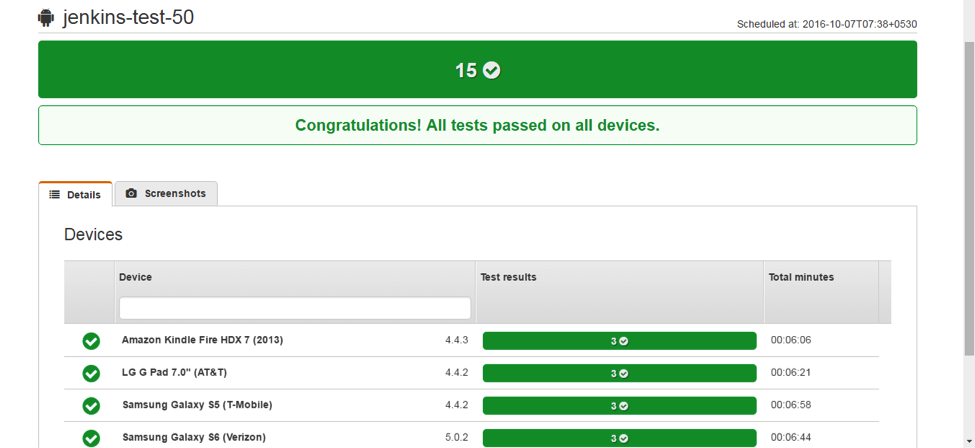
If you click the “Full Report” link, a Jenkins Test report will open in the ADF Console:
If you click any device, reports containing pass/fail information, logcat captures, device logs, screenshots, videos, and performance data are displayed.
Video
Check out how this process works in the video below:
Recent blog posts

Stay in Touch
Keep your competitive edge – subscribe to our newsletter for updates on emerging software engineering, data and AI, and cloud technology trends.

