Data-Driven Automation Using Visual Studio Excel Template
The first impression after hearing the term ‘data-driven testing’ leads to testing an application with different combinations of test data, along with some external sources where users can store, process, and validate the data. The test data is often presented in tabular format, which can be easily editable by test engineers without the necessity of any programming skills. Additionally, because the data is tabular, it is natural to present it in spreadsheets.
Let’s explore the following scenario: I needed to validate some business rules on more than 20 thousand records of test data. The test data is being processed by different kinds of Headless Automated Jobs, which are scheduled to run periodically on a daily basis, such as a run every two hours, or a run every six hours. Once these jobs run, they process the test data and subsequently perform certain activities based on the type of test data, such as sending an email, making an auto-purchase, or pulling vouchers. To create the test data, we have an Application UI which we have already automated using Selenium with C#.
In automation, whenever we look for framework where a system needs to test under a large volume of data, it should be either data-driven or key-word driven. The challenge, then, was to figure out an automation approach where I can do the following:
- Proceed with a data-driven framework: data-driven refers to reading the test data from external sources like spreadsheets, xml. or csv based on the test conditions. A spreadsheet is the best option because it is the easiest to maintain
- Avoid using the application UI to create data: since we have an Application UI that allows us to create test data, it would be difficult to create huge amount of data using the application because it would take a lot of time and the chance of failure is high. To avoid this, I decided to call the web services using C#, which were internally called in the application backend to create the data
- Use existing automation libraries: we have already automated the Application UI, so we can use these existing frameworks and save a lot of time
Considering those points, I used Visual Studio Excel project template. The additional benefits of this were:
- Can work with Excel using C#
- Can reference the libraries of existing automation framework and use the existing functions
- Debugging becomes easy because the existing framework and the Excel template are in same programming language
- Need not to work with VBA
Since I was looking for a data-driven approach, I identified the following framework components where I can read test data and process accordingly.
Test Cases
We only have a few test cases for the requirements we have to validate, but each test case itself represent the different permutation and combination of test conditions. Let’s explore this with one scenario.
Scenario
A member scheduled and appointment (30 minutes/60 minutes) with a trainer every 24, 48, and 72 hours where either the member had no inventory and card on file false, or the member had only one inventory and card on file false.
While this is only one test case, we can derive multiple test conditions, such as:
- Member, with no inventory and card on file false, creates 60 min appointment in 72 hours
- Member, with no inventory and card on file false, creates 60 min appointment in 48 hours
- Member, with no inventory and card on file false, creates 60 min appointment in 24 hours
- Member, with no inventory and card on file false, creates 30 min appointment in 72 hours
- Member, with no inventory and card on file false, creates 30 min appointment in 48 hours
- Member, with no inventory and card on file false, creates 30 min appointment in 24 hours
And so on.
In this way, the test conditions are increasing exponentially, so I decided to divide them into different parameters on a spreadsheet like so:
| Appointment Type | Time Option | Inventory | Card on File |
| 60 min | 72 | 0 | False |
| 60 min | 48 | 0 | False |
| 60 min | 24 | 0 | False |
| 30 min | 72 | 0 | False |
| 30 min | 48 | 0 | False |
| 30 min | 24 | 0 | False |
| 60 min | 72 | 1 | False |
| 60 min | 48 | 1 | False |
| 60 min | 24 | 1 | False |
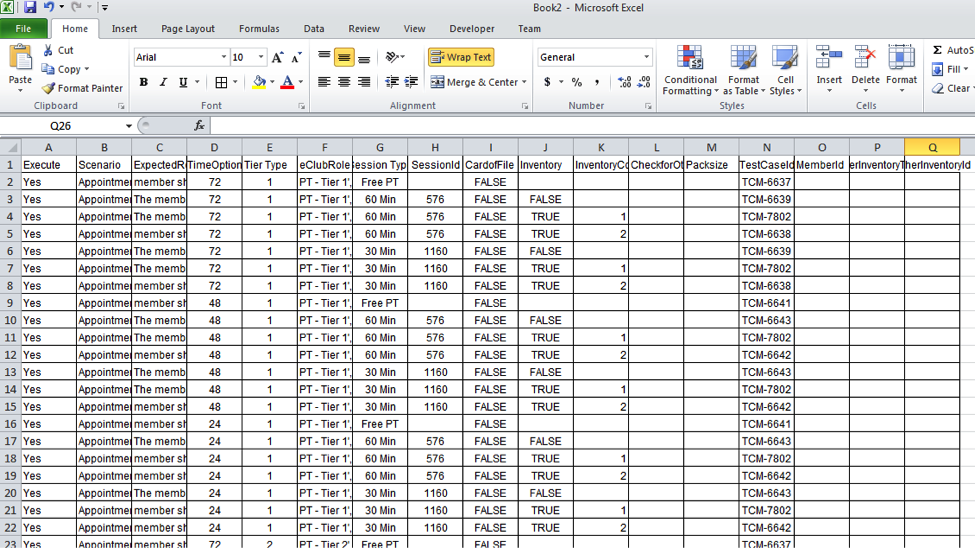
In this way, each row is representing a test condition, as shown in the following image
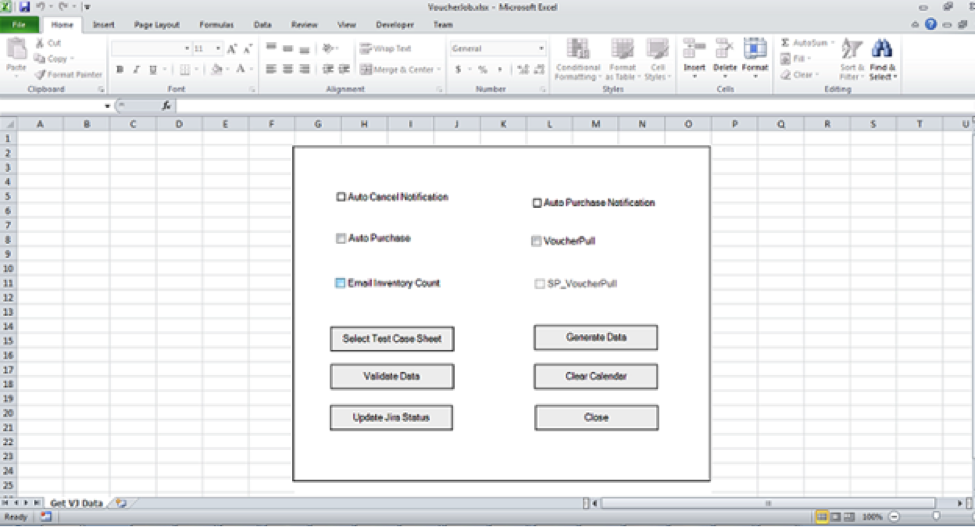
The next step is to call this input sheet, process each condition (each row), and then create and write the output data in an excel sheet. I decided the entry point of the execution using the Test Execution Controller. This is the core of the framework. Because I was using an Excel Template, I provided choices to select scenarios and buttons to select test case sheets, process input conditions, and create data. Once the data is generated, I add a new worksheet and dump the output data into that sheet.
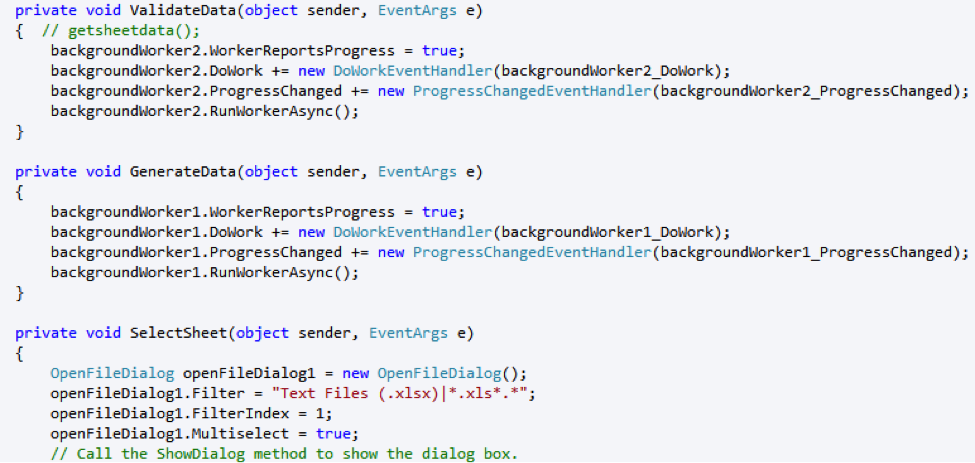
At the coding side, each control binds with some events like click, check, and select with the help of C#:
Below are the steps to configure an Excel Template using Visual Studio. Prerequisites: You should have Visual Studio 2010 or later, along with .Net Framework 4.0.
- Open Visual Studio using |File| New Project |Visual C#|Office 2010| Excel 2010 Workbook
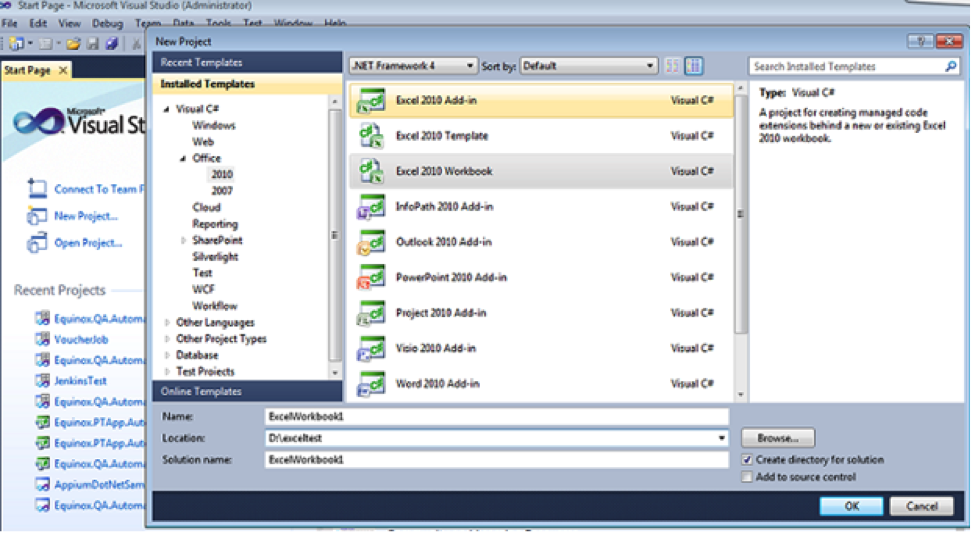
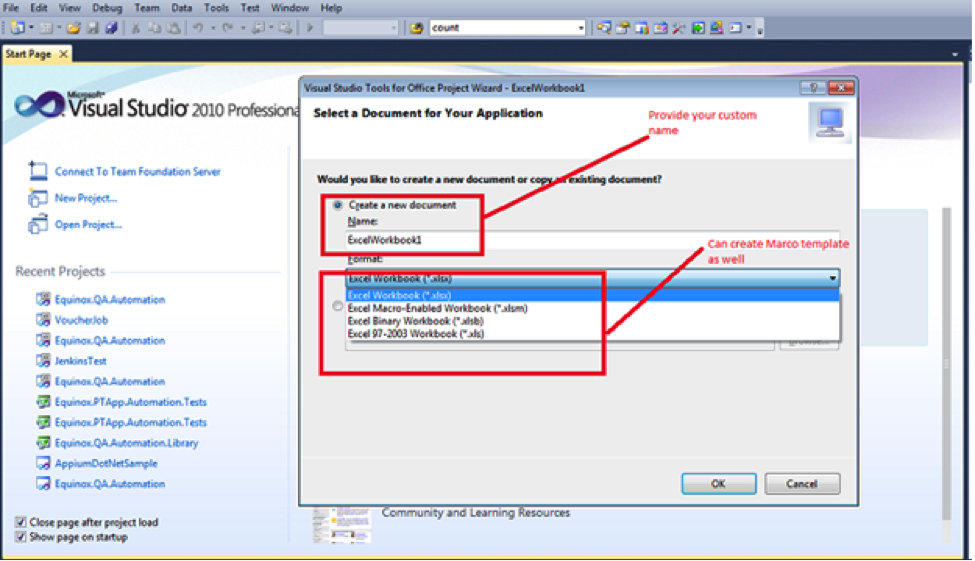
- Click OK: this will open a wizard which will allow you to specify the name of your Excel Workbook, save Excel in a different format, like XLSX or Macro, and select an existing Excel or Macro
- Visual Studio creates the Excel Project and the Sheet1.cs file that opens automatically
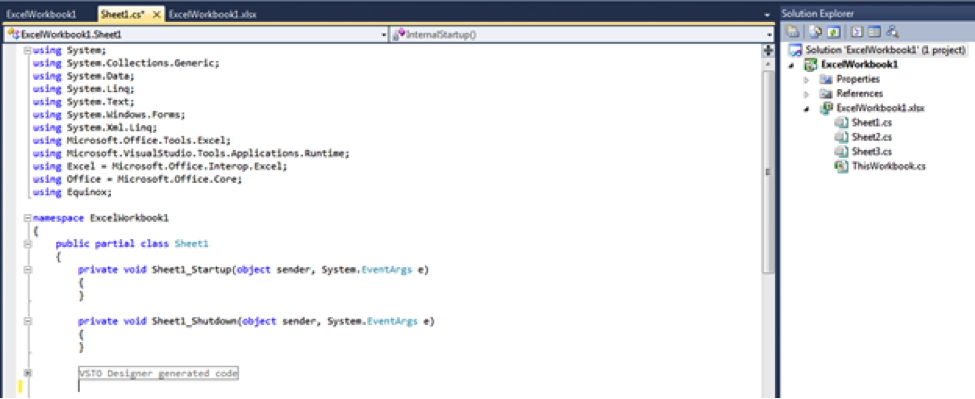
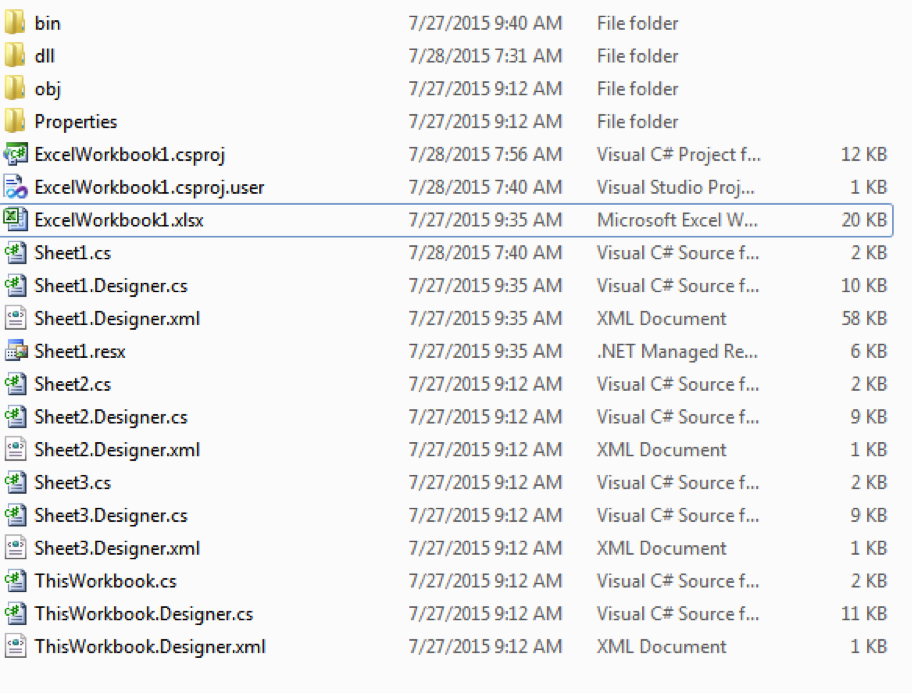
Now you are ready with your Excel project. In a folder structure, the project files would look like this:
Designing Excel
Using Visual Studio Tools:
- You can drag and drop controls directly from the Visual Studio Toolbox, but there are some controls that are not provided, such as Frames
- Open Visual Studio Toolbox – Using View | Tool box or Ctrl+X
- Drag Control e.g. Textbox, Labels and Drop on Excel Workbook
Using Excel Controls:
- Open the XLSX (ExcelWorkBool1.xlsx) from the project folder structure
- Select Developer Tab
- Click on Design Mode and Select controls from Insert option
- Save and Close the xlsx and open it in Visual Studio–this will move the changes into the Excel workbook
Coding with the Excel Workbook
It’s quite similar to working with other Visual Studio Projects, in that it allows you to add references, existing projects, etc. In this scenario, we had an existing framework which we were required to use in this project, so I added the existing project into this Excel project and referenced the DLL of the existing project in the Excel project.
Running Excel
- Using Visual Studio: Clicking F5 will build the project and open the excel sheet in run mode
- Using Excel: Opening the bin folder of the project folder and the Excel Workbook xlsx will allow it to perform certain actions which are written behind the controls
Deploying Excel Files on Another User’s Machine
Up until this point, we haven’t had any issues because everything is setup on my own machine and we are running excel only on my machine. However, what if I need to share my excel files with an end user so that they can also use the files on their machine?
We need to create deployment files using the Publishing option of Visual Studio. The steps to do this can be found here.
Once the publish is successful, the following folders will be created in your publish location:
- Application Files
- Excelworkbook.vsto
- Excelworkbook.xlsx
- Setup.exe
Now the deployment files are ready, so all you have to do is copy this publish folder to another user’s machine, which can be done by following these steps:
- Click on Excelworkbook1.xlsx and click on install – it will automatically download the required components
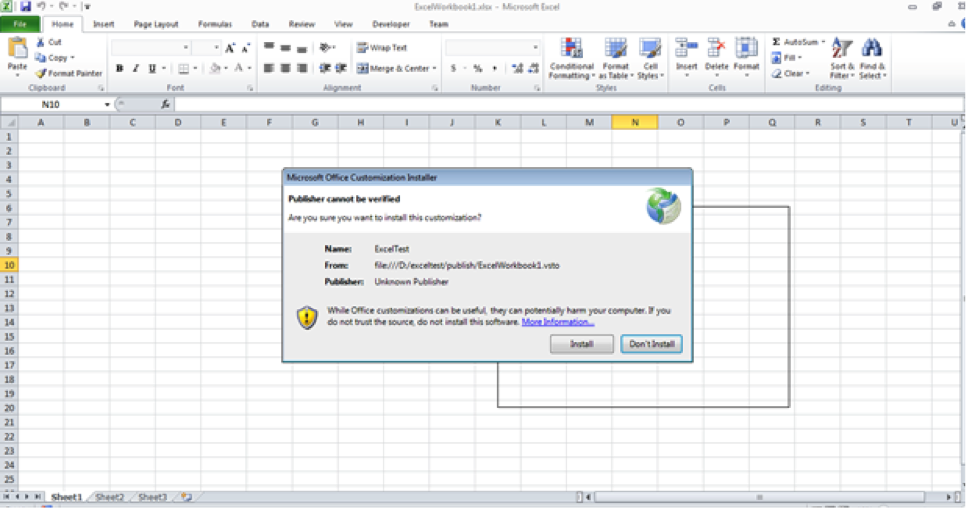
- If this does not work, click on setup.exe and once it has finished installing the components, then open Excelworkbook1.xlsx
Now you can use these Excel files on another user’s machine as well.
Note: Whenever you share a publish folder, don’t compress it because it will not work if another user extracts and installs it.
Recent blog posts

Stay in Touch
Keep your competitive edge – subscribe to our newsletter for updates on emerging software engineering, data and AI, and cloud technology trends.

